Tomb Raider Hidden Tombs locations and guide
Dom Sacco, Senior Editor
Last Updated: 23/03/2013
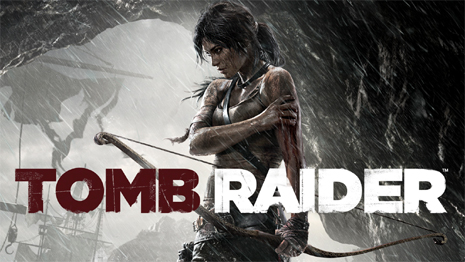
If you’re looking for the seven optional secret tombs in Tomb Raider, which give you extra XP and unlock the 50G Intellectually Superior achievement, you’ve come to the right place.
Our guide shows you where all the tombs are hidden, including their location and also a walkthrough for each one.
Hidden tomb 1: Tomb of the Unworthy
Location: Mountain Village
How to get there: After you get your climbing axe, look out for a waterfall with some white paint markings on it. Go inside to find the tomb.
Solving the puzzle: Jump across the platform to get to a brazier. Light your torch and then burn the three bodies on the platform. Push off the large crate on the right to raise the platform higher. Jump back onto the middle platform, then jump onto the climbing wall using your axe. Climb up to find the treasure chest. Simple.
Hidden tomb 2: Hall of Ascension
Location: Mountain Village
How to get there: After the pilot casts the smoke signal, begin the ascent of the clifftop crossing on the way to findhim. You’ll see the markings outside a cave.
Solving the puzzle: Close both the shutters using your axe. Head to the middle platform and wait a little while You need to time it right, so that when the first shutter opens, crank the platform up. By the time you get onto the platform, the second shutter should open, causing the wind to blow the platform to the other end of the room. Jump at the right time and use your climbing axe to grab onto the wall. Move around to the left to find the chest.
Hidden tomb 3: Well of Tears
Location: Shanty Town
How to get there: Head North and look for a building with a hanging corpse in it. It’s just West of the section which features the gate that separates the Northern and Southern parts of the town.
Solving the puzzle: Throw four cans into the middle platform to push it down to the ground. Stand in the middle of the platform so it holds your weight, then throw all the cans off of it. Move off the platform and run quickly around to a ledge nearby. Time it so that as the platform rises, you jump onto it as it’s rising, then quickly jump off to the area where the chest is.
Hidden tomb 4: Chamber of Judgment
Location: Shanty Town
How to get there: This is near the camp to the East, near the windmill.
Solving the puzzle: Throw two cans onto the base of the ramp. Use a rope arrow on the dangling tyre to smash it into a section of wall. Throw the third can that spills out onto the base of the ramp. The fourth can is found on a platform you can jump onto. Make sure you throw that one onto the base of the ramp too. You should now be able to run up the ramp and it will hold your weight. Run and jump onto the far climbing wall using your axe. Climb around to find the chest.
Hidden tomb 5: Stormguard Sanctum
Location: Summit Forest
How to get there: Head North from the fast travel point in the forest. Bring plenty of fire arrows with you. There’s a small cave opening to head through.
Solving the puzzle: Shoot a fire arrow into the junk up above you on the left when you enter. It will explode and light the nearby gas. When it’s cleared, quickly run up and head round to the left before the gas comes out again. From the next platform, aim up and shoot another fire arrow to clear a path. Take a running jump and use your climbing axe to grab onto the wall. Climb up to find the chest.
Hidden tomb 6: Flooded Vault
Location: Shipwreck Beach
How to get there: The entrance can be found on your way to the Endurance and the Cliffside Bunker. You’ll need to bring shotgun ammo with you.
Solving the puzzle: This one was the toughest tomb for us. Head upstairs and flip switch on the control panel to start the power. Head downstairs and flip the other switch to open the door. Burn the post near the raft, then use the shotgun to blow open the area on the right. Stand in that area, facing out towards the raft. Use the rope arrow to pull it towards you – twice. Jump on the raft, then onto the platform next to where you were.
Use your rope arrow to pull the light out of the water, and quickly run across to the next area while the water is safe. Now, use rope arrows to pull the raft towards you again. When it’s close to the light, use the rope arrow to pull the lamp up, then quickly pull the raft so that it rests below the light. When the light falls, it should land on the raft, stopping the water from being electrified.
Walk through the water to the stairs at the other side of the room. Follow the path to find the chest.
Hidden tomb 7: Temple of Handmaidens
Location: Shipwreck Beach
How to get there: It’s near the main camp fire on the beach, around the centre of the beach. You’ll need fully upgraded rope arrows for this one. Carry on with main storyline until you get an upgrade (you’ll find the tools for Reyes on the Endurance).
Solving the puzzle: Pull the rubble down which is blocking the entrance, using your rope arrow. Head inside. Turn the crank to allow the buoy to pass through. Head up to the platform on the left. Wait for the buoy to push a bar around in front of you. Time it right so that the bar is horizontal in front of you, then jump towards it and use it to swing to the next platform in front of you. Quickly use your rope arrow to pull the structure below you. This will make the buoy push another bar around to you. When it’s horizontal in front of you, use it to swing to the climbing wall in front of you. Use your axe to latch on, then climb up to find the seventh and final chest.
Video guide for all seven tombs
There we have it – all the optional tombs revealed. Enjoy the achievement and the now unlocked map locations.
Dom Sacco, Senior Editor
Dom is an award-winning writer and finalist of the Esports Journalist of the Year 2023 award. He has almost two decades of experience in journalism, and left Esports News UK in June 2025. As a long-time gamer having first picked up the NES controller in the late '80s, he has written for a range of publications including GamesTM, Nintendo Official Magazine, industry publication MCV and others. He also previously worked as head of content for the British Esports Federation.
Stay Updated with the Latest News
Get the most important stories delivered straight to your Google News feed — timely and reliable



From breaking news and in-depth match analysis to exclusive interviews and behind-the-scenes content, we bring you the stories that shape the esports scene.
Monthly Visitors
User Satisfaction
Years experience
